Step 1: Make two copies of the text
We'll start by making two copies of the text, one for the red color in the 3D effect and the other for blue.
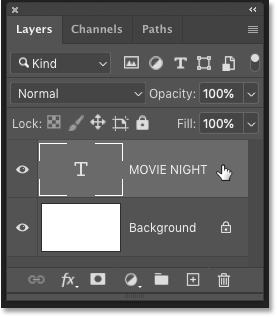
In the Layers panel, select your type layer:
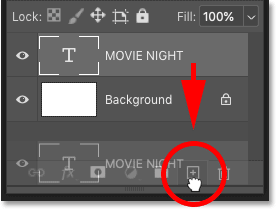
And drag the layer down onto the Add New Layer icon at the bottom:
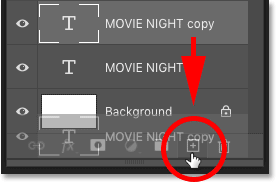
Then click on the copy of the type layer that appears above the original and drag it onto the Add New Layer icon:
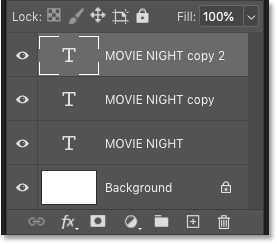
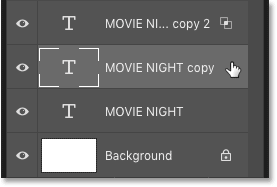
We now have the original type layer on the bottom and two copies above it:
Step 2: Open Photoshop's Blending Options
We'll use the top copy to add the color red to the effect and the copy below it to add blue.
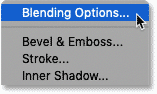
With the top copy selected, click the fx icon at the bottom of the Layers panel:
And choose Blending Options from the top of the list:
Step 3: Turn off the Red channel
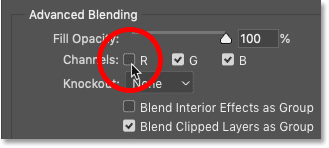
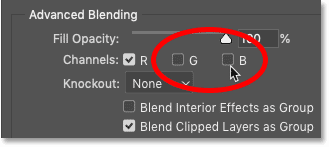
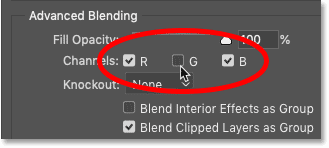
The Layer Style dialog box opens, and in the Advanced Blending section is an option called Channels with three checkboxes, R, G and B. These are the Red, Green and Blue channels that Photoshop mixes together to create all the colors we see in the image.
By default, all three channels are turned on because that's normally what we want. But we can use the checkboxes to turn off any channels we don't need on the active layer. And this is how we'll create the 3D effect:
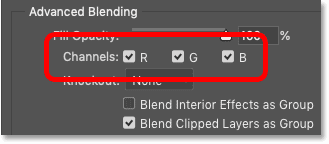
Now because we're working with black text as opposed to white, the channels that need to be turned off are the opposite of what you would expect.
For example, to add red to the 3D effect, turn off the Red channel by unchecking it. Leave the Green and Blue channels turned on:
Step 4: Close the Layer Style dialog box
When you're done, click OK to close the Layer Style dialog box:
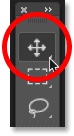
Step 5: Select the Move Tool
Now even though the Red color channel has been turned off, nothing will happen until we move the text left or right to offset it from the original.
To move the text, select the Move Tool from the toolbar:
Step 6: Set the View mode to 100%
But before moving it, go up to the View menu in the Menu Bar and make sure the 100% zoom level is selected. This allows you to nudge the text left or right by one pixel at a time:

Step 7: Offset the text to the left
Then use the left arrow key on your keyboard to nudge the text away from the original. Each time you press the arrow key, you'll move the text one pixel further to the left. Or to move the text by 10 pixels at a time, hold your Shift key as you press the left arrow key.
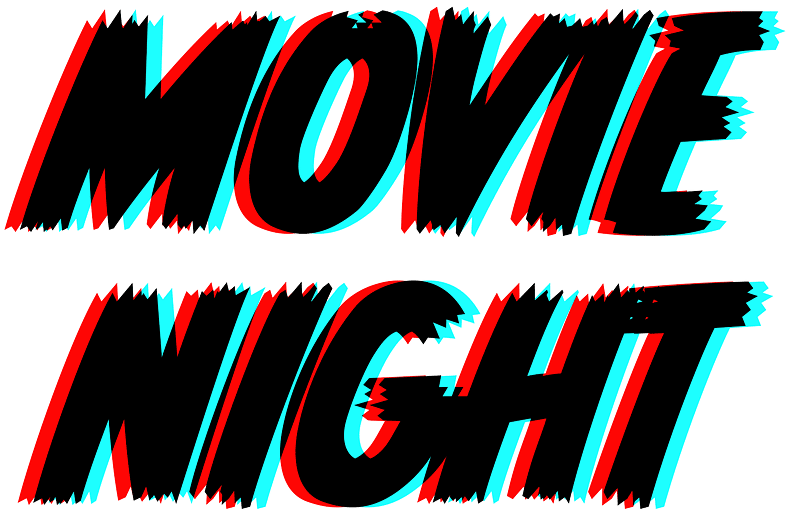
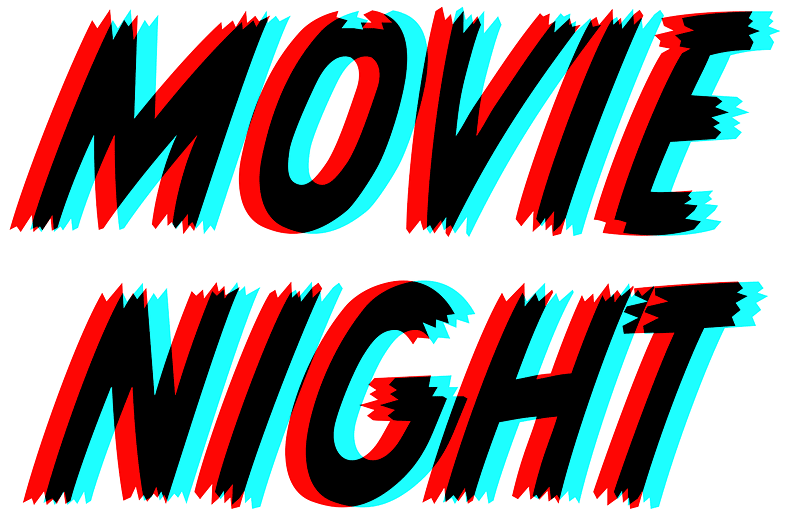
And notice that the text appears red in the areas that are offset from the original, while the original text remains black. In my case, I've moved the text 30 pixels to the left.
Make sure you remember how far you moved the text because we're going to move the other copy by the same amount but in the opposite direction:

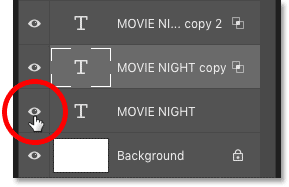
Step 8: Select the first copy of the text
Back in the Layers panel, click on the first copy of the text (the one directly above the original type layer) to select it:
Step 9: Open the Blending Options
Then click the fx icon:
And once again choose Blending Options to reopen the Layer Style dialog box:
Step 10: Turn off the Green and Blue channels
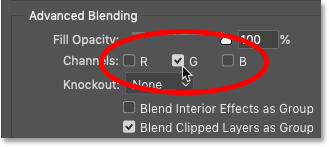
Up to this point, I've been calling our retro 3D effect a "red and blue" effect. But the "blue" color is actually cyan, which is the opposite of red.
To add cyan, leave the Red channel turned on but turn the the Green and Blue channels off. Again, this may be the opposite of what you would expect but it's because we're working with black text as opposed to white:
Step 11: Close the Layer Style dialog box
Click OK when you're done to close the Layer Style dialog box:
Step 12: Offset the text to the right
Then with the Move Tool still active in the toolbar, use the right arrow key on your keyboard to nudge the text to the right one pixel at a time, or hold Shift as you press the arrow key to nudge it by 10 pixels at a time. You want to move the text by the same amount that you moved the red text. In my case, it was 30 pixels.
And this time, the text appears cyan in the areas that are offset from the original, creating our retro 3D effect:
See also: Add a Long Shadow to your text with Photoshop!
Variation 1: Turn off the original text
At this point, the main 3D text effect is complete. But there's a couple of easy ways to create variations of it.
One way is to turn off the original type layer by clicking its visibility icon in the Layers panel:
This puts the focus more on the red and cyan colors in the effect, with the black appearing only in areas where red and cyan overlap. You may need to use the left and right arrow keys on your keyboard to adjust the spacing between the red and cyan type layers. In my case, I moved them a bit closer together:
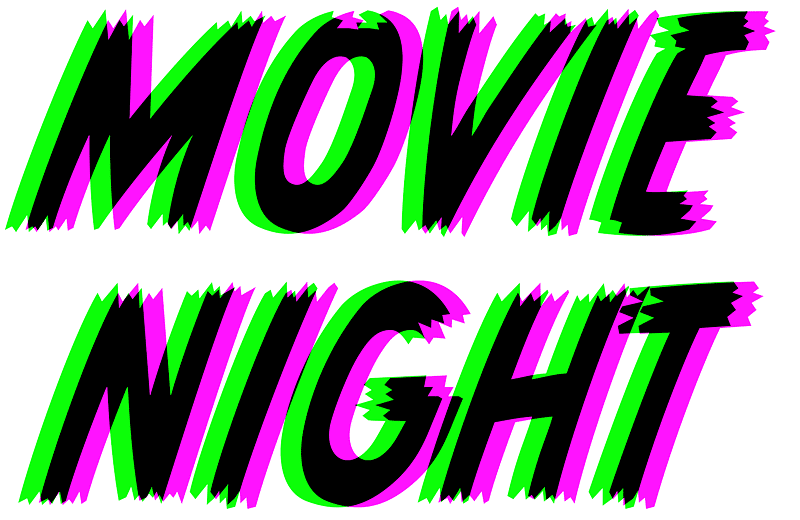
Variation 2: Change the colors in the effect
Another easy variation is to change the colors in the effect. You still want colors that are opposites of each other, but instead of red and cyan, another popular combination is green and magenta.
Step 1: Change the red color to green
In the Layers panel, double-click on the Blending Options icon on the top type layer (the one that holds the red part of the effect). Or if you can't see the Blending Options icon, double-click on any empty gray part of the layer:
Then in the Layer Style dialog box, change the red color to green by turning the Red channel on, the Green channel off and the Blue channel on. Click OK to close the Layer Style dialog box, and the red color in the effect is now green:
Step 2: Change the cyan color to magenta
Back in the Layers panel, double-click on the Blending Options icon (or on any empty gray area) for the type layer that holds the cyan part of the effect:
Then to change cyan to magenta, turn the Red channel off, the Green channel on and the Blue channel off:
Click OK when you're done to close the Layer Style dialog box.
And we now have a green and magenta 3D effect for something a bit different:
And there we have it! That's how to create a retro 3D text effect with Photoshop!
For more retro goodness, check out my tutorial on how to create 80's retro text, or see my complete list of Photoshop text effects tutorials. And don't forget, all of our tutorials are available to download as PDFs!

No comments:
Post a Comment